By Curt Lockhart, QA Technical Field Trainer & Inspector · Last updated: September 2026
Reviewed for accuracy by Cory Goeltzenleuchter, B.C.E., P.H.E., Director of Technical Services for Northwest Exterminating — September 2026
Quick answer: Northwest provides professional wildlife removal, exclusion, and attic restoration services across Georgia, Tennessee, and Alabama. If you are hearing movement in your ceiling or finding droppings in your attic, Northwest’s wildlife services team identifies the animal, remove it humanely, seal the entry point, and repair any damage left behind.
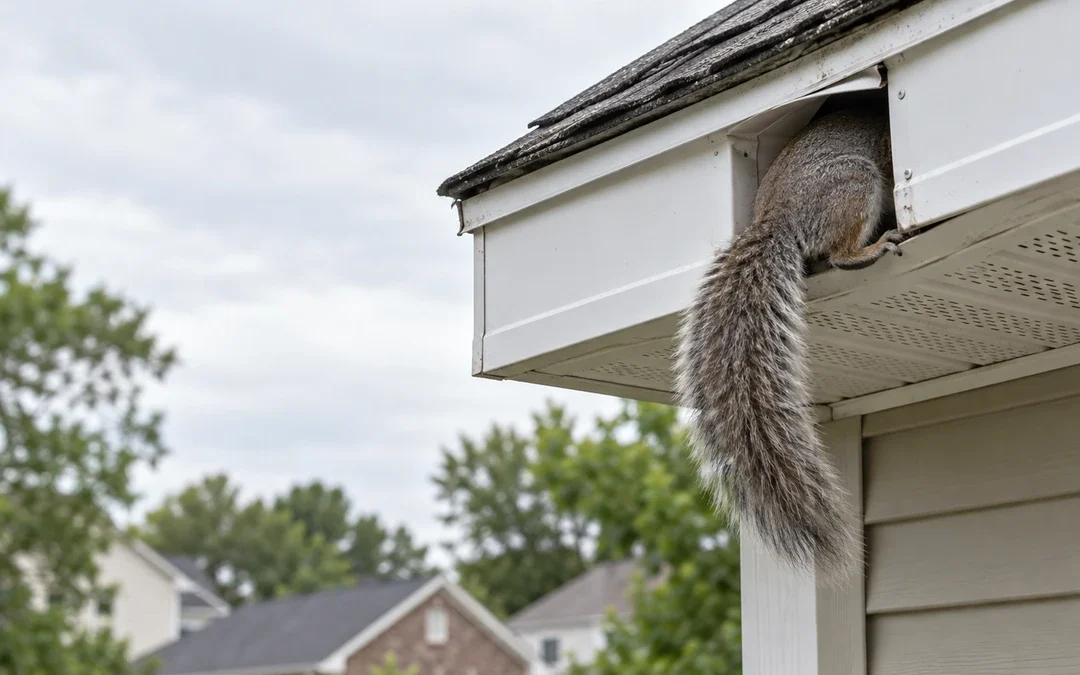
Scratching in the ceiling at 2 a.m. rarely means good news. It could be a squirrel that squeezed through a gap in your roof return, a family of raccoons that tore through your soffit vent, or bats that have been roosting above your insulation for months without your knowledge. Each of these situations calls for a different response, and getting it wrong, whether by sealing an entry point too early or trying to trap an animal yourself, can make the problem worse or even illegal.
This guide walks through how to identify what is in your attic, what each type of wildlife intrusion typically involves, how professional removal works from start to finish, and what homeowners across Georgia, Tennessee, and Alabama can expect to pay for the process.
What Is in Your Attic? Identify by Sound, Time of Day and Droppings
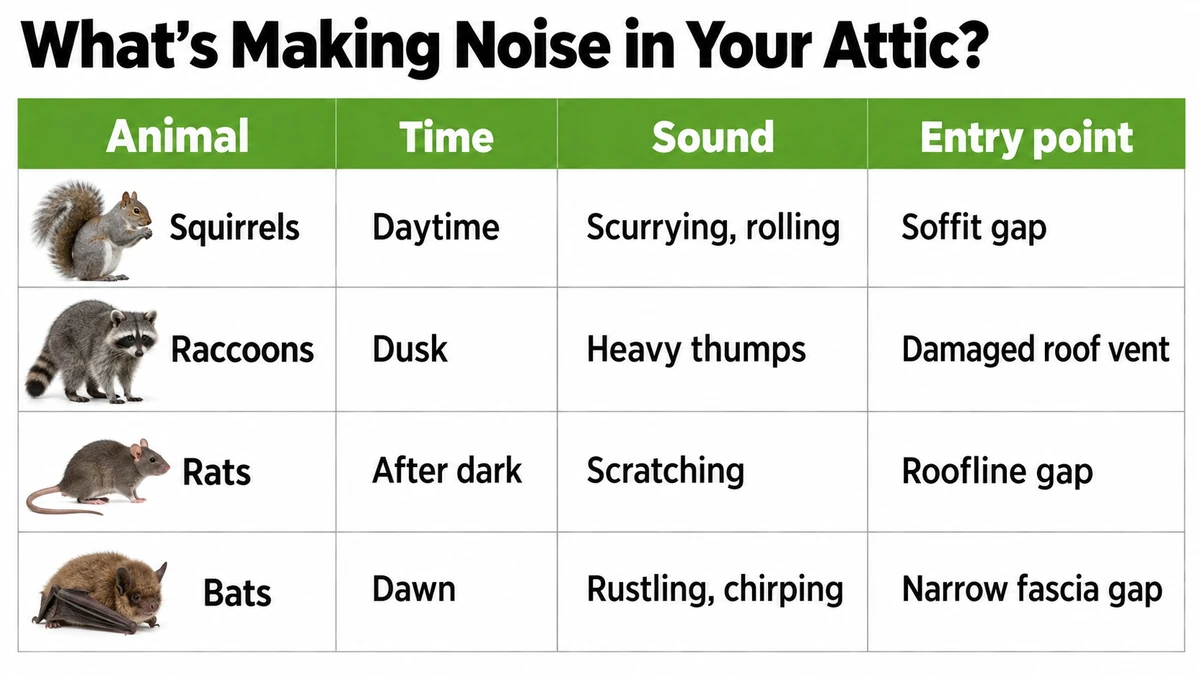
Before any removal plan makes sense, you need to know what you are dealing with. The table below breaks down the most common attic invaders by the clues they leave behind.
Animal
When You Hear It
What It Sounds Like
Droppings
Entry Size
Typical Damage
Squirrels
Early morning and late afternoon
Quick scurrying, scratching, occasional gnawing
Small, pellet-shaped, clustered near nesting sites
1.5 to 2 inches
Chewed wiring, gnawed fascia and roof returns
Roof rats
Mostly at night
Light scratching, running along joists
Small, spindle-shaped, scattered along travel paths
Loud thumping, rolling, chirping if kits are present
Large, tubular, often in a single latrine spot
4 to 6 inches or larger
Torn ductwork, crushed insulation, ceiling stains
Bats
Dusk and dawn, near roost entry
Faint squeaking, fluttering
Small, crumbly, resembles mouse droppings but crumbles into powder
0.5 inch or a gap the width of a finger
Guano accumulation, staining, odor
Opossums
Nighttime, slow movement
Low shuffling, occasional hissing
Larger, tubular, irregular
3 to 4 inches
Insulation displacement, minor structural damage
Birds
Daytime, especially early morning
Chirping, fluttering, scratching near vents
Small, whitish, concentrated near nests
1 to 3 inches, often at vents
Blocked vents, nesting debris, odor
The simplest tell is timing. Daytime scampering usually means squirrels, after-dark scratching usually means rats or raccoons, and rustling at dusk near the gable usually means bats.
Squirrels in the Attic
Squirrels are the most common attic intruder across the Southeast, and for good reason. They breed twice a year, typically in late winter and again in mid-summer, which means a single female can move into an attic to raise a litter with little warning. Once nested, squirrels chew on fascia boards, roof returns, and anything that gets in the way of their den, including electrical wiring.
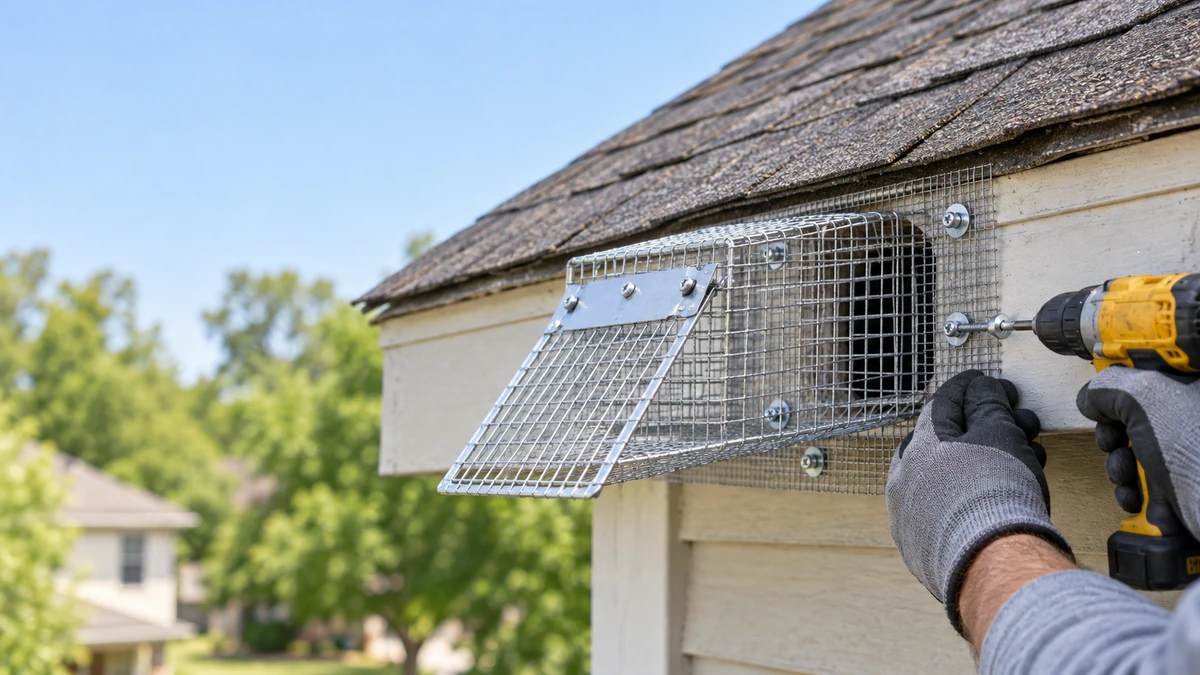
That last point matters more than most homeowners realize. Chewed wiring inside an attic is a documented fire risk, and it is one of the reasons professional exclusion focuses on more than just removing the visible animal. Northwest technicians typically install one-way exclusion doors at the identified entry point, which allow squirrels to leave the attic to forage but prevent them from returning. This method works well for adult squirrels, but it is not a complete solution if there is a nest of young inside. Trapping or excluding an adult while leaving dependent young behind creates a bigger problem: the young will die in the attic, and the mother will often attempt to chew a new entry point to reach them.
“The most common mistake we see is a homeowner sealing what looks like the only entry point before confirming the attic is clear. Once you do that, you have trapped animals inside, and the damage they cause trying to get out is almost always worse than what brought them in,”
says Curt Lockhart, QA Technical Field Trainer & Inspector, Northwest Family of Brands.
Raccoons in the Attic
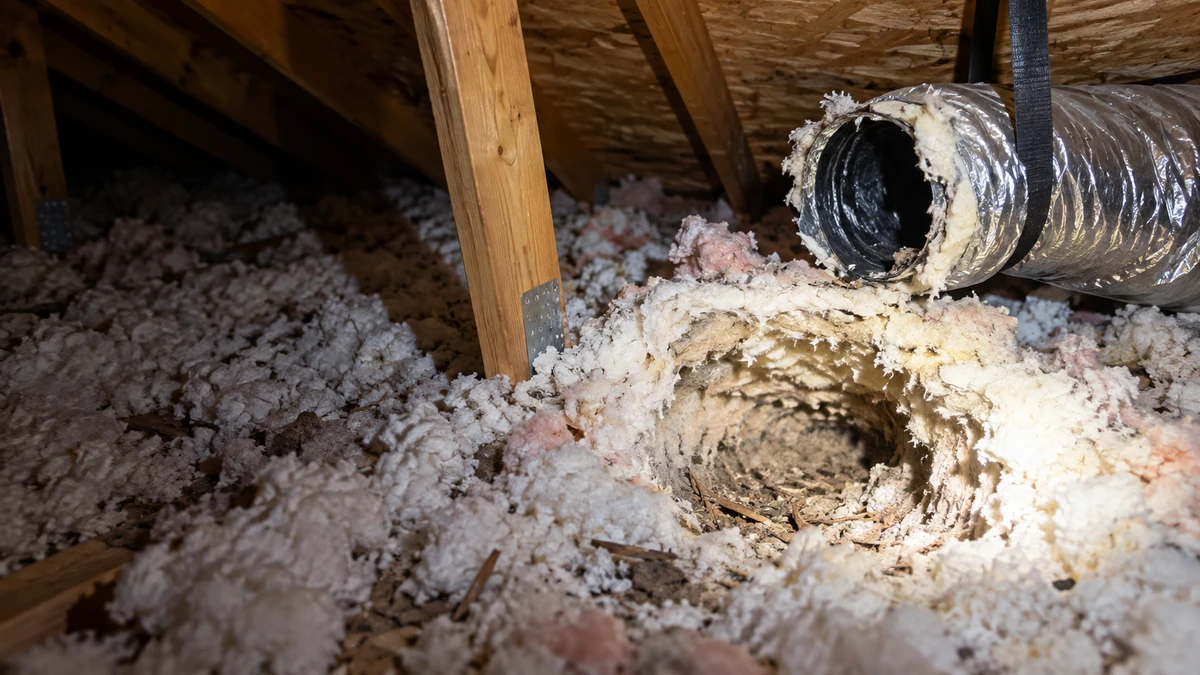
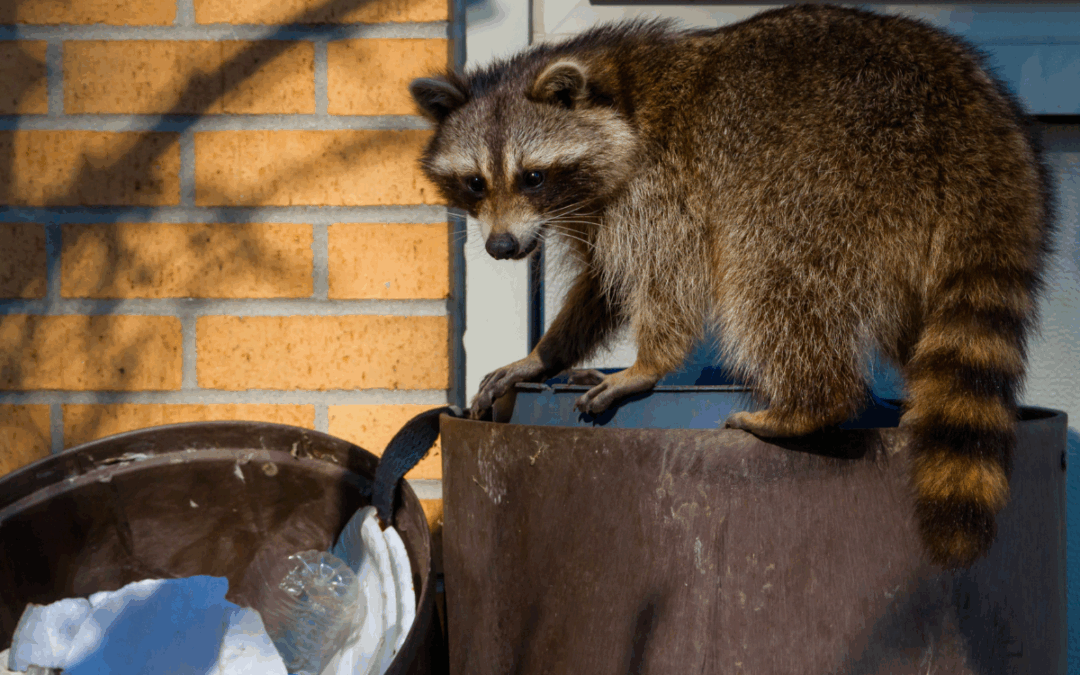
Raccoons cause some of the most extensive attic damage of any wildlife species, largely because of their size and strength. A raccoon looking for a denning site will tear through soffit material, crush insulation to create a nesting area, and often damage ductwork in the process. Their droppings also present a genuine health concern. Raccoon latrines can contain roundworm eggs that pose a risk to humans and pets if disturbed without proper protective equipment.
Mother raccoons denning with kits add another layer of complexity. Removing a mother without accounting for her young can leave dependent kits trapped in the attic, and state wildlife regulations in Georgia, Tennessee, and Alabama generally require licensed operators to handle raccoon removal specifically because of these disease and welfare considerations. This is not a species homeowners should attempt to handle on their own, both for safety reasons and because most jurisdictions require licensing for raccoon trapping and relocation.
Bats in the Attic
Bats present a different set of challenges entirely. A bat colony can grow slowly and quietly, leaving guano to accumulate for months before a homeowner notices the smell or spots droppings in the insulation. Beyond the odor, accumulated guano can pose respiratory risks and requires careful remediation.
Timing is the critical factor with bat exclusion. Most bat species in the Southeast have a maternity season, typically from late spring through mid-summer, during which flightless pups remain in the roost while adults come and go to feed. Sealing an attic during this window traps pups inside, where they will die, and creates both an ethical problem and a decomposition and odor issue. For this reason, licensed operators wait until young bats are flying on their own before installing one-way exclusion valves, which let the colony leave naturally without being able to return. Sealing an attic at the wrong time of year is one of the most common and most damaging mistakes in wildlife exclusion, which is why species identification and seasonal timing both matter before any sealing work begins.
“With bats, timing is everything. If exclusion work starts during maternity season, the pups cannot leave on their own yet, and sealing the roost can trap them inside. The odor and structural damage that follow are often worse than the original problem. Identifying the species and confirming the season before any sealing begins is non-negotiable,”
explains Curt Lockhart.
How Animals Get In
Wildlife does not need a large opening to find its way into an attic. Most entry points trace back to one of the following:
Overhanging limbs and canopy contact. Tree branches touching or hanging near the roofline give squirrels and raccoons a direct bridge onto the house.
Gable and ridge vents. These vents are often protected by thin screening that deteriorates over time or that animals chew through.
Soffit and fascia gaps. Rot or minor separation in soffit and fascia boards creates an easy access point, particularly for squirrels and rats.
Roof return junctions. The seams where roof planes meet are common weak points, especially on older roofs.
Chimney chases. Uncapped or poorly capped chimneys are a frequent bat and raccoon entry route.
Ridge vent lift. Wind and age can lift sections of ridge vent, creating gaps large enough for smaller animals to slip through.
Rotted trim and construction gaps. Any area where wood has softened from moisture exposure is vulnerable to gnawing and expansion by animals looking for a way in.
How Professional Wildlife Removal Works, Step by Step
A proper wildlife removal process involves more than trapping the animal you can see. Northwest’s process generally follows these steps:
Inspection and identification. A technician inspects the attic, roofline, and exterior to identify the species involved, locate entry points, and assess the extent of nesting or damage.
Humane removal or one-way exclusion. Depending on the species and season, technicians either remove animals directly or install one-way exclusion devices that let them leave without returning.
Entry point sealing. Once the attic is confirmed clear, all identified entry points are sealed with materials designed to withstand future gnawing or weather exposure.
Damage repair. Chewed wiring, torn ductwork, and damaged fascia or soffit material are repaired to restore the attic’s structural integrity.
Insulation remediation and sanitation. Contaminated or crushed insulation is removed and replaced, and affected areas are sanitized to address droppings, urine, and odor.
Follow-up monitoring. Technicians check sealed entry points and the attic space to confirm the exclusion held and no new activity has started.
Wildlife Removal Across the Northwest Service Area
Wildlife pressure varies by region, shaped by local tree cover, housing age, and climate. Northwest serves homeowners dealing with attic wildlife across the following metro areas:
Marietta, GA. Mature tree canopy throughout established neighborhoods gives squirrels and raccoons easy roof access, making canopy contact one of the most common entry routes Northwest addresses in the area.
Chattanooga, TN. The mix of wooded hillside properties and older housing stock in Chattanooga means soffit and fascia gaps are a frequent point of entry, particularly in homes built before modern vent screening standards.
Savannah, GA. Savannah’s humidity and mature oak canopy create ideal conditions for both squirrel activity and bat roosting, and Northwest’s technicians account for seasonal maternity timing when planning exclusion work in the area.
Atlanta, GA. As one of the most heavily wooded metro areas in the Southeast, Atlanta sees consistent squirrel and raccoon pressure, with roof returns and ridge vents among the most common entry points.
Birmingham, AL. Birmingham’s older neighborhoods, many with aging rooflines and chimney chases, see frequent raccoon and bat activity, and Northwest’s wildlife services team is equipped to handle the regulatory requirements specific to Alabama.
Northwest serves each of these metros with the same inspection-first approach, adjusted for the entry points and species most common to the local area.
What It Costs and What Is Included
Wildlife removal pricing can vary depending on the animal, property size, and what is needed to fully address the issue.
Removal starts at $350.
Exclusion, sealing, and remediation are customized based on the property and scope of work.
Every project begins with a free inspection so our team can identify the issue, recommend the right solution, and provide an accurate estimate before work begins.
Frequently Asked Questions
Who do I call for an animal in my attic?
A licensed wildlife removal company should be your first call, particularly for species like raccoons and bats, which are subject to state regulations around trapping and relocation. Northwest provides inspection and removal services across Georgia, Tennessee, and Alabama.
What company provides wildlife removal in Marietta, Chattanooga, or Savannah?
Northwest Exterminating provides wildlife removal services in Marietta, Chattanooga, and Savannah, as well as throughout Georgia, Tennessee, and Alabama. Services include attic inspection, humane animal removal, entry point exclusion and sealing, insulation remediation, and follow-up monitoring.
How do I know if it is squirrels, rats, or raccoons?
The type of sound, the time of day you hear it, and the size and shape of any droppings you find are the clearest indicators. Squirrels are typically active at dawn and dusk, rats mostly at night, and raccoons produce louder, heavier movement after dark. A professional inspection can confirm the species with certainty.
Is wildlife removal humane?
In most cases, yes. Northwest uses humane removal methods and one-way exclusion devices that allow animals to leave an attic on their own without being able to return. A small number of situations, such as a sick or injured animal or a species that cannot be safely excluded, call for a different approach, and your technician will explain that before any work begins.
How much does wildlife removal cost?
Costs depend on the species involved, the extent of exclusion work needed, and whether damage repair or insulation remediation is required. A free inspection is the best way to get an accurate quote for your specific situation.
How long does the whole process take?
Timelines vary by species and situation. Exclusion using one-way doors typically takes one to two weeks to confirm an attic is clear, while species like bats may require waiting for maternity season to end before sealing can begin safely.
Concerned About Wildlife in Your Attic?
If you are hearing movement overhead or finding droppings in your attic, waiting rarely makes the problem smaller. Book a free wildlife inspection with Northwest for wildlife removal, exclusion, and attic restoration across Georgia, Tennessee, and Alabama.
Curt Lockhart serves as a QA Technical Field Trainer & Inspector for the Northwest Family of Brands, specializing in wildlife and commercial pest services. He supports teammate development through hands-on training, technical guidance, safety education, and quality assurance best practices. Curt’s experience helps ensure consistent service excellence and effective pest management solutions for customers.
Reviewed for Accuracy
Cory Goeltzenleuchter, B.C.E., P.H.E., Director of Technical Services for Northwest Exterminating, is one of the organization’s leading technical experts in pest management. As a Board Certified Entomologist and Public Health Entomologist, he oversees technical training, service standards, and industry best practices while helping ensure customers receive extraordinary service through science-based solutions, ongoing education, and innovative approaches across the Northwest Family of Brands.
Atlanta’s heat and humidity don’t just bring out the bugs—they also drive wildlife indoors. During August, attics become a popular hideout for animals escaping the heat. While it may seem minor at first, these attic invaders can cause serious damage and health concerns for homeowners. Here are three common attic invaders in the Atlanta area, what attracts them, and how to keep them out.
Common Attic Invaders in Atlanta
1. Squirrels
Why They’re There:
Squirrels are agile climbers and often enter attics through roof gaps, vents, or loose shingles. During hot months, they look for shaded, quiet areas to build nests.
What They Cause:
Chewed wires and wood, increasing fire risk and structural damage
Nests made with attic insulation, leading to reduced energy efficiency
Droppings that create odors and spread bacteria
Prevention Tips:
Trim tree limbs near your roof
Seal entry points with metal mesh or caulk
Keep outdoor garbage and food sources secured
2. Raccoons
Why They’re There:
Raccoons are persistent and strong. They can tear through soffits or siding to get into attics, especially when looking for shelter or food.
What They Cause:
Torn insulation, broken ductwork, and structural damage
Contaminated areas due to droppings and urine
Health risks from parasites and diseases like rabies
Prevention Tips:
Install approved chimney cover device
Remove outdoor attractants like pet food and bird feeders
Check the roof regularly for loose or damaged spots
3. Bats
Why They’re There:
Bats can squeeze through cracks as small as 3/8 inch and often roost in attics to raise their young.
What They Cause:
Accumulated guano, which damages insulation and structures
Strong ammonia-like odors and increased mold risk
Health concerns such as histoplasmosis and rabies exposure
Prevention Tips:
Seal small gaps around vents, siding, and chimneys
Use bat exclusion devices that allow exit without return
Avoid handling bats, as they are protected under federal law
Tips to Keep Wildlife Out
A proactive approach can help reduce the chance of animals entering your attic:
Seal entry points throughout your home’s exterior
Remove food sources from your yard and outdoor spaces
Keep vegetation trimmed and yard clutter to a minimum
Inspect your attic for droppings, sounds, or nesting signs
When to Call Wildlife Control Experts
If animals have moved into your attic, it’s best to bring in trained professionals. Wildlife can be unpredictable, and improper handling can lead to further damage—or violations of federal wildlife laws.
What wildlife control professionals provide: Animal removal tailored to species and situation
Repair of damage and sealing of entry points
Guidance to help prevent future infestations
Protect Your Home from Wildlife This Summer
Squirrels, raccoons, and bats can all find their way into Atlanta homes during the summer. With the right steps and support, you can keep wildlife out and maintain the comfort of your home.
Reach out to a trusted local wildlife control team to inspect, remove, and help prevent future problems.
Tennessee’s picturesque landscapes are a joy to live in, filled with rolling hills, lush greenery, and thriving wildlife. But with all this natural beauty comes one thing every homeowner dreads encountering too close to home: snakes. While most snakes you’ll find here are harmless and even beneficial as natural pest controllers, you probably don’t want them turning your home into their habitat. Fortunately, there are simple, effective ways to keep snakes out of your living spaces. Follow these practical tips to snake-proof your Tennessee home and enjoy peace of mind.
How To Snake-Proof Your Tennessee Home
Seal the Gaps
Snakes are experts at finding their way inside through even the smallest openings. Cracks as narrow as a quarter inch can become their point of entry, so it’s crucial to inspect your home and seal gaps thoroughly.
How to Snake-Proof Your Home’s Exterior
Inspect Exterior Walls and Foundations: Conduct a detailed walk-around, looking closely at cracks in the foundation, walls, and even utility line entry points.
Use Caulk or Weatherproof Sealants: For small gaps and cracks, seal them up with caulk or silicone-based products to create a pest-proof seal.
Install Door Sweeps: If light shines through beneath your doors, that’s likely a big enough space for a snake. Install rubber door sweeps under exterior doors to block their path.
Cover Vents with Screens: Many homes have attic vents and crawlspace openings. Use fine-mesh wire screens to cover these areas while keeping ventilation intact.
Securing these entry points doesn’t just deter snakes; it also prevents insects and rodents from getting inside.
Tidy Up the Yard
Your yard can unintentionally invite snakes if it offers prime hiding spots. Snakes are drawn to areas where they can safely rest and hunt prey. Keeping your outdoor space tidy goes a long way toward making your property unappealing to these slithering creatures.
Yard Maintenance Tips
Keep Grass Trimmed: Tall grass gives snakes plenty of cover to move around unseen. Mow your lawn frequently, especially near your home’s foundation and fences.
Clear Woodpiles and Debris: Firewood and leaf piles are warm, sheltered spots snakes love to hide in. Store firewood at least 12 inches off the ground and keep it far from the house. Remove leaves, rocks, and other debris regularly.
Trim Plants and Bushes: Dense shrubbery close to your home can create a perfect hiding place. Maintain a well-trimmed yard and ensure there’s a clear gap between plants and your home’s walls.
Avoid Ground-Level Clutter: Tarps, discarded materials, or even outdoor toys lying around make for inviting snake shelters. Stow items neatly in sheds or off the ground.
A clutter-free and well-maintained yard sends a clear message to snakes that they won’t find a cozy home here.
Steps to Deter Prey
Rodent Control: Snakes love to feast on mice and rats. Look for signs of rodent activity (gnaw marks, droppings) and eliminate infestations promptly using traps or professional rodent control services.
Secure Trash Bins: Rats and other pests scavenging through open garbage can attract snakes. Use tightly sealed lids on trash bins.
Avoid Leaving Pet Food Outdoors: Pet kibble left outside overnight can attract both rodents and snakes. Feed pets indoors or pick up food bowls promptly.
Eliminate Standing Water: Stagnant water in gutters, flowerpots, or birdbaths attracts both insects and amphibians, which snakes prey on. Regularly empty or fix areas where water collects.
Reducing the food supply makes your property far less appealing for hungry snakes.
Secure Sheds, Garages, and Crawlspaces
Cool, dark spaces like garages, sheds, and crawlspaces are highly attractive to snakes. Without proper precautions, these areas can become their go-to hideaways.
Tips to Snake-Proof Storage Areas
Close Gaps Around Doors: Like your home’s main doors, garage and shed doors can have gaps underneath. Install new weather-sealing strips to block them.
Screen Openings: Cover crawlspace vents, attic openings, and other access points with durable wire mesh screens to keep larger pests out while retaining airflow.
Declutter Storage Areas: Avoid clutter in sheds and garages. If items are stored on the floor, consider using shelves to keep them elevated and reduce hiding places.
Keep Doors Shut: Make it a habit to close garage or shed doors when not in use. Leaving them open, even briefly, can invite snakes to slip inside unnoticed.
Regular inspections of these areas can help catch any issues before they escalate.
Keep Snakes Out—and Peace of Mind In
Snake-proofing your Tennessee home doesn’t have to be overwhelming. Simple steps like sealing entry points, clearing yard clutter, removing food sources, and securing storage areas can make a big difference. And if snakes keep showing up, calling a wildlife services or pest control company near you can give you the expert support—and peace of mind—you need.
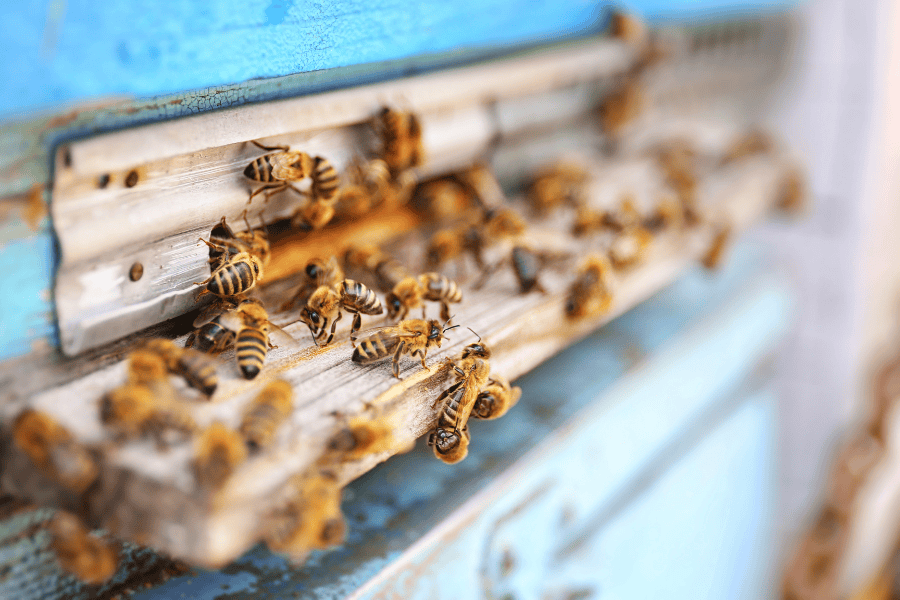
If you’ve discovered a buzzing colony of honeybees on your property, you might be wondering what to do. Don’t worry—there’s a way to handle this situation that protects both your home and these important little pollinators! Honeybee relocation is a great solution, and local beekeepers are key to making it happen.
Honeybees are vital for pollinating plants, which helps flowers bloom and fruits and vegetables grow. But sometimes, they end up in places that aren’t ideal for homeowners. This is where beekeepers step in to relocate the colony, giving the bees a better location while ensuring your property is free of concerns.
Here’s why local beekeepers play such an important role in this process and how it benefits homeowners like you.
The Role of Local Beekeepers
Why Honeybee Relocation Matters
Honeybees play a huge role in our environment. They pollinate about one-third of the crops we eat, including fruits, vegetables, nuts, and more. Without them, plants wouldn’t grow as well or produce as much food.
However, as urban areas expand and natural spaces shrink, honeybees sometimes end up building their hives in places like walls, attics, or trees near homes. Relocation protects their colonies and ensures they can continue their important work elsewhere, away from high-traffic areas or living spaces.
How Local Beekeepers Contribute
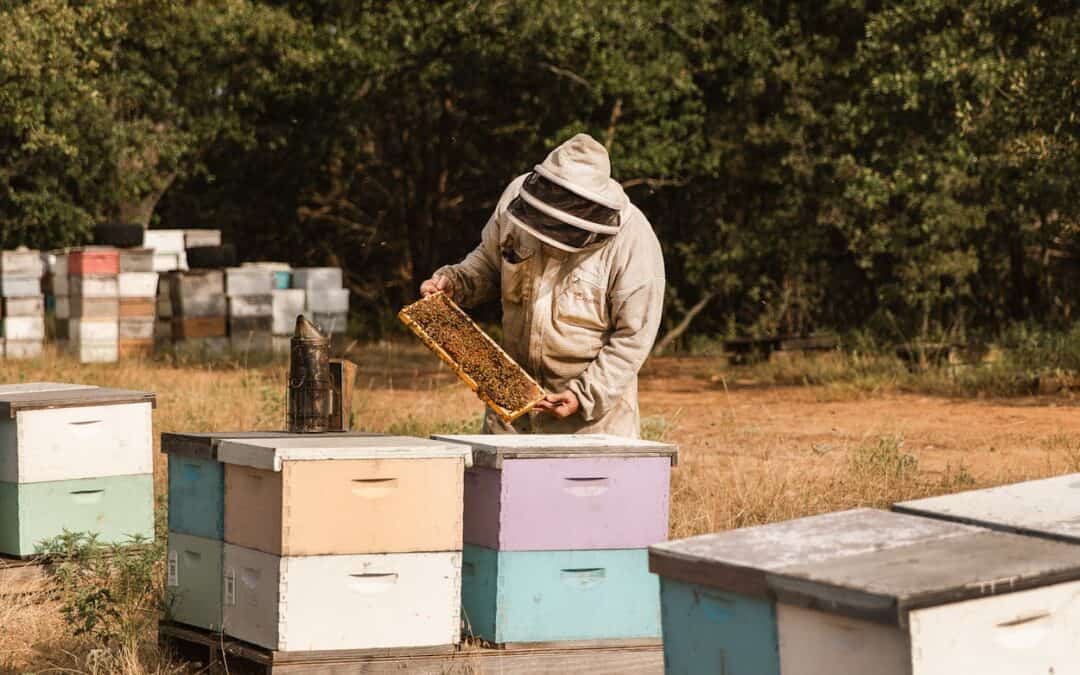
Beekeepers are experts in handling honeybee colonies. Their knowledge and care make relocation possible while keeping the bees healthy and productive. Here’s how they help:
Giving Bees a New Home: Beekeepers often have managed spaces like bee farms or apiaries where relocated colonies can thrive. These locations are perfect for bees to continue pollinating plants and producing honey.
Understanding Hive Behavior: Bees operate as a colony, working together to support their queen and each other. Beekeepers know how to handle them with care, ensuring the hive stays intact during the move.
Supporting Agriculture: Relocated bees are often placed near farms or gardens, where they help pollinate crops like peaches, blueberries, and melons. This partnership strengthens local agriculture.
Educating the Community: Many beekeepers teach people about the importance of bees and why they should be protected. Through their work, they spread awareness about how critical pollinators are to our environment.
What Happens During Relocation?
When honeybee colonies need to be relocated, local beekeepers and pest control professionals often team up. Here’s what the process looks like:
Inspection: The hive is carefully inspected to understand its size and structure.
Relocation: Beekeepers gently remove the hive and transport it to a better spot.
New Home Setup: The bees are placed in a welcoming location like an apiary, where they can continue thriving.
Monitoring: After the move, beekeepers check on the hive to ensure the bees adjust well to their new surroundings.
Benefits for Homeowners
Choosing honeybee relocation not only solves the immediate problem of a hive on your property but also helps the environment in several ways. Here’s how you benefit:
Peace of Mind: Knowing that the hive has been expertly relocated lets you enjoy your property without worry.
Environmental Impact: Relocated bees continue pollinating plants, contributing to healthier gardens, farms, and ecosystems.
Local Honey: Relocated bees may eventually produce honey that supports farmers’ markets and local businesses.
Learning Opportunity: Seeing how beekeepers work can help you better understand the importance of bees and inspire eco-friendly habits.
Why This Matters
Honeybees are facing growing challenges like habitat loss and pesticide use . The work of local beekeepers in relocating hives is crucial for supporting bee populations. Without honeybees, we risk losing countless plants that depend on them, from garden flowers to crops that feed our families.
By choosing relocation over extermination, homeowners can make a big difference. It’s a simple decision that protects the bees, your property, and the environment.
Next time a hive appears near your home, remember that local beekeepers are here to help. They’re not just moving bees—they’re protecting pollination, promoting agriculture, and contributing to a thriving planet. Together, we can all do our part to support these incredible pollinators and keep our communities blooming. If you find a hive on your property, reach out to honeybee experts to responsively relocate the bees and protect your space, all while supporting a healthier environment.
Bees are some of Georgia’s most essential pollinators, yet they face increasing threats from habitat loss, pesticides, and climate change. For homeowners looking to cultivate beautiful and eco-friendly gardens, planting bee-friendly plants can provide a non-toxic environment for these critical pollinators, all while enhancing the vibrancy of backyard spaces.
This blog explores the best bee-friendly plants for Georgia gardens, including native flowers, beneficial herbs, and flowering trees and shrubs. Whether you’re a seasoned gardener or just starting your green-thumb journey, these plant recommendations will help you create an inviting habitat that supports pollinator health.
Recommendations: Bee-Friendly Plants
Why Plant a Bee-Friendly Garden?
Before we dig into plant recommendations, it’s important to highlight why bee-friendly gardens matter:
Pollination Power: Bees are responsible for pollinating over 75% of flowering plants and nearly 35% of the food crops we eat.
Supporting Biodiversity: Planting for bees cultivates ecosystems that support a variety of pollinators, birds, and other wildlife.
Healthy Landscapes: Bee-friendly gardens eliminate the need for harsh pesticides, creating healthier spaces for homeowners and pets.
By including the right plants, you enable bees to thrive while also enjoying a more stunning, productive backyard. Now, let’s explore the best options for your Georgia garden.
Native Flowers for Pollinators
Georgia’s climate is rich in biodiversity, making it an ideal environment for native flowers. These plants naturally thrive in the region’s soil and climate while offering crucial resources to native bees.
1. Purple Coneflower (Echinacea purpurea)
Purple Coneflower is a favorite among gardeners and pollinators alike. With its daisy-like petals and vibrant purple hue, this perennial attracts numerous bee species, including bumblebees and carpenter bees. It’s hardy, drought-resistant, and blooms throughout summer, providing lasting nourishment.
Sun Requirements: Full sun to partial shade
Bloom Period: Summer to early fall
Benefit: Supports both honeybees and native bees
2. Black-Eyed Susan (Rudbeckia hirta)
Known for its golden-yellow petals and dark centers, Black-Eyed Susan is a pollinator magnet. These vibrant flowers not only attract bees but also support butterflies and songbirds.
Sun Requirements: Full sun
Bloom Period: Summer to early fall
Benefit: Easy to grow and resilient in Georgia’s warm climate
3. Coreopsis (Coreopsis spp.)
Coreopsis, often called “tickseed,” is a cheerful perennial that thrives in Georgia gardens. Bees love their bright yellow flowers, which bloom prolifically when exposed to full sunlight.
Sun Requirements: Full sun
Bloom Period: Spring through fall
Benefit: Long-lasting blooms and minimal maintenance
4. Lavender (Lavandula spp.)
Lavender serves a dual purpose in gardens, offering a soothing fragrance to humans and a rich source of nectar to bees. Its tall, purple flowering spikes are irresistible to a variety of pollinators.
Sun Requirements: Full sun
Bloom Period: Late spring to early summer
Benefit: Deters pests while attracting bees
5. Basil (Ocimum basilicum)
While most people grow basil for its culinary uses, it’s also a bee-loving herb if allowed to flower. Its small clusters of white or purple blooms provide nutrients for pollinators throughout the season.
Sun Requirements: Full sun
Bloom Period: Summer
Benefit: Combines garden aesthetics with kitchen utility
6. Rosemary (Rosmarinus officinalis)
Rosemary’s evergreen foliage and tiny blue blooms make it a favorite in Georgia gardens—both for pollinators and gardeners. Its flowers can appear even in winter, providing much-needed nectar during colder months.
Sun Requirements: Full sun
Bloom Period: Winter to late spring
Benefit: Thrives in Georgia’s well-draining soils
Flowering Trees and Shrubs for Pollinators
Flowering trees and shrubs create a stunning visual centerpiece in your yard while offering significant benefits for pollinators. These larger plants serve as vital food sources and shelter for bees in your region.
1. Redbud (Cercis canadensis)
One of Georgia’s most beloved native trees, the Redbud graces gardens with its vibrant pink blossoms in early spring. Its flowers are among the first food sources for bees after winter hibernation.
Sun Requirements: Full sun to partial shade
Bloom Period: Early spring
Benefit: A crucial pollinator food source after winter
2. Tulip Poplar (Liriodendron tulipifera)
The Tulip Poplar, often referred to as the “bee tree,” features distinct yellow-green flowers that are highly attractive to bees. This towering tree is a staple for pollinators looking for abundant nectar.
Sun Requirements: Full sun
Bloom Period: Late spring
Benefit: Provides large amounts of nectar for honeybees
3. Southern Magnolia (Magnolia grandiflora)
Nothing captures the beauty of Southern gardens quite like the Southern Magnolia. Its large, fragrant white blossoms are not only a visual feast but also a rich nectar source for native pollinators.
Sun Requirements: Full sun to partial shade
Bloom Period: Spring and summer
Benefit: Supports bees while adding elegance to your landscape
Tips for Maintaining a Bee-Friendly Garden
After selecting the right plants, the following tips will ensure your Georgia garden remains a bustling bee haven:
Avoid pesticides and herbicides, as these chemicals can harm bees and other beneficial insects.
Incorporate a mix of plants that bloom at different times to provide year-round nectar.
Include shallow water sources like birdbaths or dishes filled with water and pebbles for hydration.
Allow some plants, like herbs, to flower to attract pollinators.
By implementing these practices, you’ll create not just a beautiful garden, but a thriving ecosystem that supports pollinators in the Georgia region.
Create Your Bee-Friendly Oasis
Bee-friendly gardening is more than just a trend—it’s an investment in the environment and the future of pollinators. By planting native flowers, herbs, and flowering trees and shrubs, you’re building a sanctuary for bees while enjoying vibrant blooms, fragrant herbs, and a healthier landscape.
If a beehive has ended up in an unwanted place on your property, our honeybee experts are here to help! Contact our team for eco-friendly pest control solutions to protect both your home and these essential pollinators.
Bees are some of the hardest working creatures out there. They pollinate flowers, fruits, and vegetables, making our gardens grow and keeping our food supply strong. If you’re living in Metro Atlanta and want to welcome more bees to your yard, it’s easier than you might think! By making a few small changes, you can create a bee-friendly yard that helps these vital pollinators thrive. Here’s how.
Tips For A Bee-Friendly Yard
Why Bees Need Our Help
Bee populations have faced many challenges over the years—things like habitat loss and climate change. Without bees, a lot of the plants we rely on for food and beauty wouldn’t thrive. Creating a bee-friendly yard is one-way homeowners can make a big difference. Even small adjustments on your property can provide bees with the resources they need to keep buzzing and pollinating.
Easy Tips for a Bee-Friendly Yard
Not sure where to start? Here are some simple steps to transform your yard into a haven for pollinators.
1. Plant Native Flowers and Shrubs
Native plants are like a bee’s favorite restaurant—they provide the perfect food and habitat. Bees especially love plants that produce nectar and pollen, so consider adding a variety of flowers, shrubs, and trees that bloom at different times of the year to feed them throughout the seasons.
Some great options for Metro Atlanta include:
Black-eyed Susans
Purple Coneflowers
Sunflowers
Milkweed
Goldenrod
Having a mix of colors, shapes, and sizes will also attract a wider variety of bees and other pollinators.
2. Skip Chemicals
Bees are highly sensitive to pesticides, herbicides, and other chemicals. Instead of using traditional weed killers or harsh sprays, try natural alternatives. For example:
Use mulch to suppress weeds.
Try plant-based or homemade pest deterrents.
Welcome helpful bugs (like ladybugs) to keep pests under control.
Going chemical-free is not only better for bees but also for your entire backyard ecosystem. Look for green pest control options!
3. Provide Fresh Water
Bees get thirsty too! Add a simple water source to your yard, but make sure it’s bee-friendly. A shallow dish of water with pebbles or floating wood pieces will help bees drink without risking them getting stuck. Change the water regularly to keep it fresh.
4. Keep It Messy (Sometimes!)
While we love a well-manicured yard, bees appreciate a bit of wildness. Allow part of your garden to grow naturally, leaving wildflowers or clovers to sprout. You can even create a small “bee corner” filled with pollinator-friendly blooms and plants that don’t need much trimming.
5. Build a Bee Hotel or Habitat
Not all bees live in hives like honeybees. Many, like bumblebees and solitary bees, make their homes in the ground or inside hollow stems. Consider leaving some bare soil or building a small bee “hotel” from wood, bamboo, or other natural materials. It’s a fun project and a great way to attract nesting bees.
Extra Benefits of a Pollinator-Friendly Yard
The best part of creating a bee-friendly yard is that the effort pays off in more ways than one. Bees will love your yard, and you’ll benefit too! Here’s how:
More Blooms: Pollinated flowers produce more blossoms, giving your garden extra color and beauty.
Better Vegetables and Fruits: If you grow a garden, bees will help your crops flourish, resulting in bigger harvests.
Eco-Friendly Practices: Supporting pollinators means helping the environment and contributing to a healthier planet.
Taking the First Step
You don’t need to overhaul your entire yard to make it bee-friendly. Start small by planting a few native flowers or setting out a water dish. Little changes can make a big impact over time.
If you’d like more tips or professional help with creating a bee-friendly space, or if you need assistance managing an unexpected hive, reach out to your local bee relocation company. They’re there to support you and the bees, making your yard both beautiful and welcoming for pollinators!
Bees are essential to our ecosystem. They pollinate flowers, fruits, and vegetables, making them integral for Tennessee’s lush gardens and thriving agriculture. However, typical pest control practices often inadvertently harm these invaluable insects. As a Tennessee homeowner, balancing pest control with environmental responsibility is a challenge—but not an impossible one. This guide focuses on bee-friendly pest control practices that help protect these vital pollinators while keeping your home and garden pest-free.
The Importance of Bee-Friendly Pest Control
Why Protecting Bees Matters in Tennessee
Bees are not just important for the environment—they contribute directly to the economy of states like Tennessee. From pollinating crops like apples, watermelon, and pumpkins to supporting wildflower blooms that benefit local wildlife, bees play a huge role. Unfortunately, widespread pesticide use has been a key contributor to the decline of bee populations. This decline could have dire consequences for agriculture and biodiversity.
But with a few mindful changes to your pest control approach, you can support pollinator health while maintaining your home’s comfort and well-being. Read below to find out how!
Spray Pesticides in the Early Morning or Late Evening
When using pesticides, the timing of your application is one of the most critical factors for bee protection. Bees are most active during the daytime—typically from mid-morning to late afternoon. Applying pesticides during these peak hours increases the likelihood of exposing them to harmful chemicals. To minimize the risk, consider scheduling treatments in the early morning or late evening when bees are less active.
Instead, opt to spray pesticides:
Early morning before the sun has fully risen and bees begin foraging.
Late evening after bees have retreated to their hives for the night.
By targeting these times, you reduce the chances of directly affecting bees while ensuring pests are still managed effectively. You can also ask your local pest control company if they can accommodate bee-friendly application times to further protect these important pollinators.
Choose Bee-Ethical Products Labeled as Non-Toxic to Pollinators
Not all pesticides are created equal. Some are formulated to minimize harm to beneficial insects like bees. When choosing a professional pest control company, look for those explicitly labeled as “bee-protected or “non-toxic to pollinators.”
Here’s what to avoid and what to consider:
Avoid: Broad-spectrum insecticides such as neonicotinoids, which are highly toxic to bees.
Use:
Natural products containing neem oil, which target pests while posing minimal risk to pollinators, are a great option. Partnering with a green pest control company that prioritizes honeybee protection ensures the use of eco-friendly solutions.
Organic treatments like insecticidal soaps or horticultural oils, designed for ethical pest management, can effectively control pests while keeping pollinators safe.
These products allow you to take care of garden pests without risking the health of your local bee population. If in doubt, consult a pest control professional who prioritizes environmentally-friendly solutions.
Spot-Treat Problem Areas Instead of Blanket-Spraying
Blanket-spraying your entire yard is not only unnecessary but also harmful to the environment. This approach increases pesticide exposure for non-targeted species, including bees. Instead, focus on spot-treating problem areas where pests are concentrated.
How to spot-treat effectively:
Identify high-pest areas (e.g., near plant roots, under leaves, or by entry points into the home).
Apply pesticides directly to these areas with precision.
Use the smallest effective dose to control the infestation.
Spot-treating is a more targeted strategy that minimizes collateral damage to bees and other beneficial insects.
Leave Some Flowering Plants Untouched for Bees to Forage
Bees rely on flowering plants for food, so when applying pest control measures, it’s crucial to leave a portion of your yard bee-friendly. Reserving areas of blossoming plants untouched by pesticides creates foraging zones for pollinators.
To encourage a pollinator environment:
Plant native flowers that bloom throughout the year. Favorites in Tennessee include purple coneflower, black-eyed Susan, and bee balm.
Designate a bee garden—a no-spray zone where pollinators can forage without interference.
Avoid spraying flowering plants directly.
By creating these havens, you ensure that bees can continue to thrive, even while managing pests elsewhere in your yard.
Bonus Tips for Tennessee Homeowners
Incorporate Companion Planting
Companion planting involves pairing specific plants that naturally repel pests with your garden crops. For instance:
Marigolds deter aphids and beetles.
Lavender repels flies and moths while attracting bees.
This natural method not only reduces your need for chemical pesticides but also supports pollinator activity.
Avoid Mowing Flowering Weeds
While dandelions and clovers may be considered weeds, they’re important food sources for bees. Limiting mowing in areas where these plants grow allows pollinators to access vital nutrients, particularly in early spring.
Partner with Eco-Friendly Pest Control Services
For a sustainable pest control approach, partner with an eco-friendly company that prioritizes honeybee protection. Many services in Tennessee offer solutions that target pests while keeping pollinators unharmed. Homeowners can help by adjusting pesticide timing, choosing non-toxic treatments, and creating foraging zones. If a beehive ends up in an unwanted spot, contact our honeybee experts to responsibly rehome it.
Bees play a remarkable role in maintaining our ecosystem. Their tireless work as pollinators supports the growth of plants that provide food, oxygen, and habitat for countless species, including us. However, when bees decide to make their home just a little too close to yours, it can pose challenges for homeowners. If you’ve noticed increased bee activity around your house, don’t panic! This guide will help you recognize the signs of a potential bee infestation and explain how professional help can manage the situation while staying out of harm’s way.
Managing a Bee Infestation
Recognizing the Signs of a Bee Infestation
Before you assume you have a bee infestation, it’s important to identify the signs. Here are some telltale indicators that bees may have established a colony on your property:
1. Frequent Bee Sightings Near Your Home
Seeing a few bees in your yard is perfectly normal, especially in garden-friendly states like Georgia. But if you notice a consistent stream of bees flying to and from a specific location, it could be evidence of a nearby colony.
2. Buzzing Sounds Inside Walls or Ceilings
Bees commonly build their colonies within the walls or ceilings of homes. If you hear a faint but steady humming sound, especially in quiet rooms, it could be the sound of an active colony.
3. Sticky Residue or Dark Stains
If bees have built a colony inside your walls, over time, melted honey or wax may create sticky or dark stains on surfaces. Inspect areas with staining or discoloration to check for other signs of bee activity.
4. Lingering Bees Around Specific Features
Check attics, vents, chimneys, or exterior cracks in the foundation. Bees are resourceful when it comes to nesting, and these areas are common colony building spots.
5. Sightings of Swarms
A bee swarm can understandably seem alarming, but swarms are often temporary . Swarming typically happens when bees are searching for a new nesting site. If they’re congregating nearby, they might be looking to settle on your property.
Why You Shouldn’t Attempt DIY Removal
We understand you might be tempted to address the problem yourself. However, when it comes to bees, DIY efforts can sometimes make matters worse. Here’s why leaving it to a professional is essential:
Proper Identification: Not all stinging insects are bees—correctly identifying them ensures the right approach.
Avoid Secondary Issues: Improper colony removal can leave behind honey and wax, attracting pests and odors.
Health Risks: Approaching a colony without protection can lead to stings—leave it to the experts.
Bee Preservation: Professionals focus on no-harm colony relocation to protect the environment.
How Professional Services Can Help You
If you’ve identified signs of a bee infestation, partnering with a professional bee relocation service is the next best step. Specialists in handling bee situations offer tailored solutions that balance your needs as a homeowner with the wellbeing of the bee population. Here’s how experts can assist:
Thorough Assessment: Experts evaluate the colony’s location, size, and species to determine the best approach for removal.
Humane Relocation: Many services focus on relocating colonies instead of destroying them, often partnering with beekeepers to ensure bees are moved to a better habitat.
Protective Measures: Technicians use specialized equipment and methods to handle the colony without unnecessary risks to people or property.
Long-Term Solutions: Beyond removal, professionals seal entry points and recommend ways to prevent future colony activity.
Education & Guidance: Experts offer insights on recognizing early colony formation, reducing attractants, and coexisting with pollinators.
Contact Professional Services for Bee-Related Concerns
As a homeowner, it’s normal to feel concerned when bees settle a little too close for comfort. But with expert guidance and humane solutions, managing a bee infestation can be as stress-free as possible. Protect your home and support local pollinators by reaching out to your local bee removal experts today!
Georgia is home to a wide variety of snake species, both venomous and non-venomous. While most snakes play a vital role in the ecosystem by controlling rodent populations, their presence in and around homes can be unsettling. Understanding snake behavior, knowing what to do if you encounter one, and exploring snake pest control options can help you manage and prevent unwanted snake encounters.
Snake Pest Control in Georgia
Common Snakes Found in Georgia
Georgia has over 40 snake species, with only a few being venomous. Knowing the difference can help you determine whether a snake poses a danger.
Non-Venomous Snakes
Eastern Rat Snake – Often found near barns, attics, and basements, these snakes help control rodent populations.
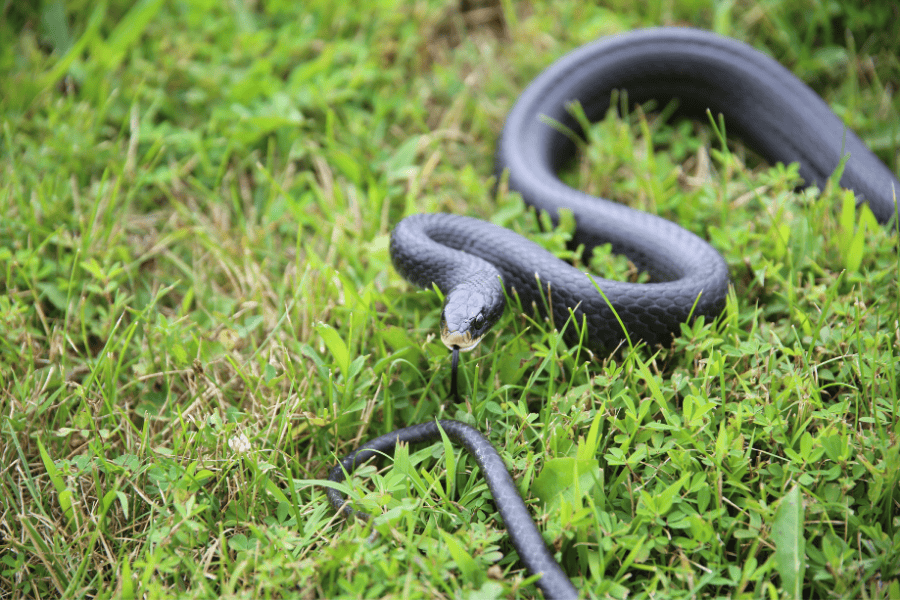
Black Racer – Fast-moving and non-aggressive, these snakes are commonly seen in yards and gardens.
Garter Snake – Recognizable by their striped pattern, they are harmless and frequently found in grassy areas.
Corn Snake – Sometimes mistaken for copperheads, corn snakes are non-venomous and excellent at controlling pests.
Venomous Snakes
Eastern Diamondback Rattlesnake – The largest venomous snake in the U.S., found in pine forests and coastal areas.
Copperhead – Often camouflaged in leaves, copperheads are responsible for many snake bites in Georgia.
Cottonmouth (Water Moccasin) – Typically found near water, they are aggressive and highly venomous.
Timber Rattlesnake – Found in wooded areas, these snakes deliver a dangerous bite.
Coral Snake – Rare but venomous, coral snakes have bright red, yellow, and black bands.
What to Do If You Encounter a Snake
Encountering a snake can be alarming, but staying calm is crucial. Here’s what you should do:
Identify from a Safe Distance – Avoid approaching or handling the snake.
Back Away Slowly – Snakes are unlikely to attack unless threatened.
Secure Children and Pets – Keep them away from the snake’s path.
Do Not Attempt to Kill It – Many snake bites occur when people try to kill or handle them.
Call a Professional – If you suspect the snake is venomous or it is in your home, contact a snake removal expert.
Can Pest Control Get Rid of Snakes?
Many people wonder, “Can pest control get rid of snakes?” While traditional pest control focuses on insects and rodents, some wildlife control companies specialize in snake removal. These services include:
Snake Trapping and Removal – Humane traps are used to capture and relocate snakes.
Property Inspections – Professionals inspect your home for entry points and recommend sealing gaps and cracks.
Habitat Modification – Removing debris, tall grass, and woodpiles makes your property less attractive to snakes.
Rodent Control – Since snakes follow their food source, controlling rodents can reduce snake sightings.
What Keeps Snakes Away?
To prevent snakes from entering your property, consider the following snake control strategies:
Eliminate Food Sources
Snakes are drawn to areas with ample food. Reducing rodents, insects, and bird eggs in your yard can deter them.
Modify Landscaping
Trim Grass and Bushes – Keep your lawn short and bushes trimmed to reduce hiding spots.
Remove Woodpiles and Clutter – Snakes often hide in stacked wood, debris, and overgrown vegetation.
Use Snake-Repellent Plants – Plants like marigolds, lemongrass, and wormwood may deter snakes.
Seal Entry Points
Snakes can enter homes through tiny gaps. Seal cracks, holes, and vents with mesh or caulk to prevent entry.
Use Snake Repellents
There are natural and commercial snake repellents available, including:
Sulfur and Naphthalene – Found in snake repellent granules.
Essential Oils – Clove and cinnamon oil sprays may repel snakes.
Commercial Repellents – Products specifically designed for snake deterrence.
Snake Removal: When to Call a Professional
If you frequently see snakes on your property or inside your home, it’s time to call a wildlife control company. Professional snake removal services ensure:
Safe Handling and Relocation – Experts use proper tools to remove snakes without harm.
Snake Identification – Professionals determine if the snake is venomous.
Prevention Plans – Wildlife control experts help keep snakes from returning.
Conclusion
Snakes are an essential part of Georgia’s ecosystem, but they can be a nuisance when they invade homes and yards. By identifying common snake species, knowing what to do if you encounter one, and implementing snake pest control strategies, you can minimize encounters. If you have persistent snake problems, a professional wildlife control company can provide safe and effective snake removal solutions.
*Inspection fee for Bird Control or Snake Removal begins at $125. These service inspection fees will be applied to total service cost if bird control and/or snake removal services are completed.
By submitting, you agree to be contacted about your quote. See our Privacy Policy.
READY TO GET STARTED?
REQUEST A FREE ESTIMATE
Fill out the form below or call (866) 800-2197 for a free, no-obligation estimate.
READY TO GET STARTED?
REQUEST A FREE ESTIMATE
Fill out the form below or call (866) 800-2197 for a free, no-obligation estimate.
READY TO GET STARTED?
REQUEST A FREE ESTIMATE
Fill out the form below or call (855) 374-3795 for a free, no-obligation estimate.