Dec 22, 2020 | CrawlSpace
It’s nearly impossible not to spend money during the holiday season. While we want to enjoy this time of gift-giving with our loved ones, it can sometimes burn a hole in our wallets! Even though the holidays are upon us, you can still find ways to cut back on costs and even create a healthier environment for your home!
Attic Insulation
Attic insulation can help save on energy costs and ensure you are living in a healthy environment. Some say that attic insulation is essential in cutting down on air and heat that escapes from your home. Reducing the amount of energy escaping can help lower your energy bills, potentially saving you up to 30%!
Besides the financial impact of attic insulation, it can also help prevent overwintering pests. Pests like rats, mice, and roaches are looking for a warm place to stay over the colder months. They can easily damage your home and bring in harmful diseases. Attic insulation can help reduce and control the number of pests making their way inside your home.
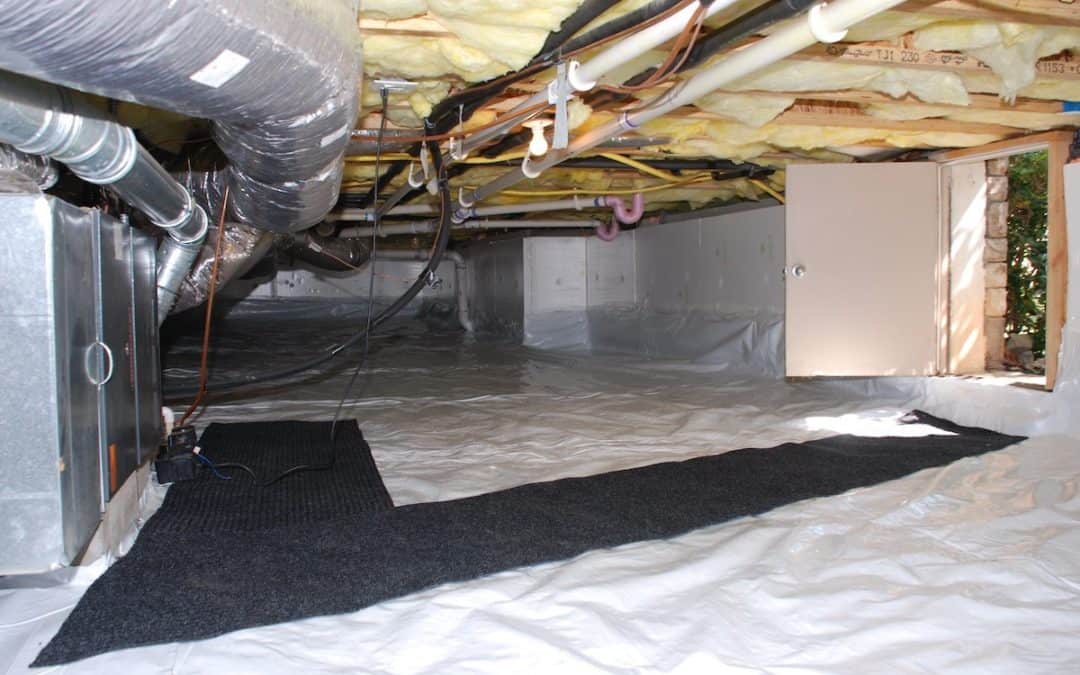
Crawlspace Enclosure (CrawlSpace Care)
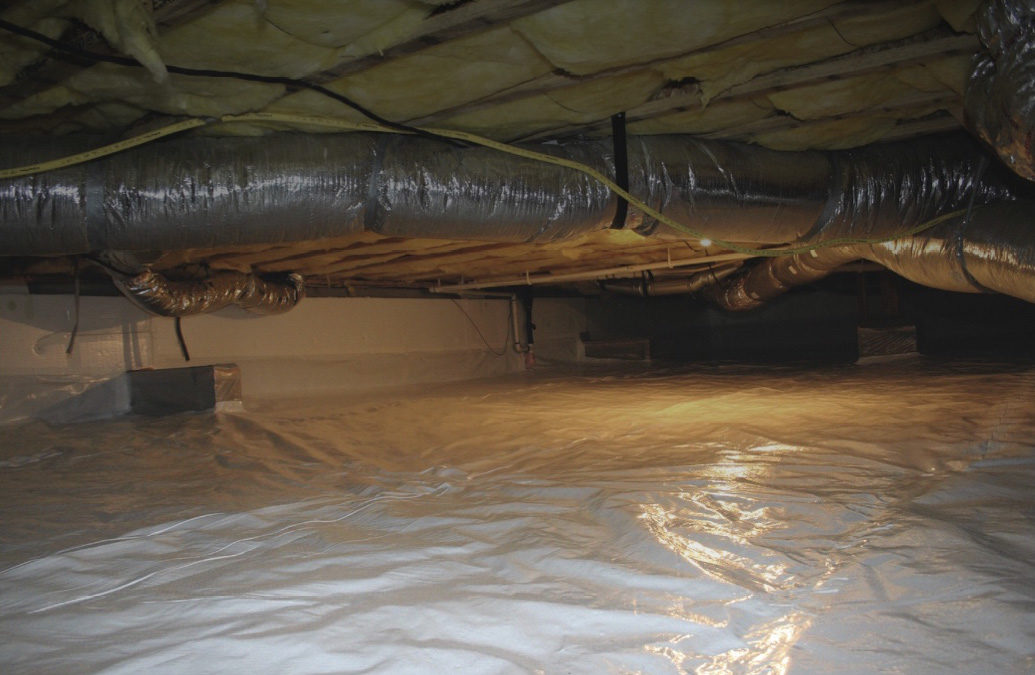
Crawlspace enclosure provides many benefits to homes that have them. Enclosing your crawlspace can help lessen the workload of your HVAC unit. This can help save you up to 18% on your utility bill and control humidity levels throughout your home.
While saving money on your utility bill is always a plus, making sure your family is living in a healthy environment is just as important! When you enclose (whether it’s the attic or the crawlspace), you will reap the benefits of improved air quality, consistent temperatures, and pest prevention including wood-eating insects.
Investing in insulation in your home will not only help you during the holiday season but year-round. For more information or to get a free quote, contact your local pest control company where a professional can recommend the best plan for your home.

Dec 11, 2020 | CrawlSpace
Dealing with cold winter weather outside is bad enough; when the cold temperatures start creeping into your home it’s even worse. Heating systems work hard enough in the winter time to keep our homes warm and comfortable. Additional cold air seeping into your house leaves us with cold feet and higher energy bills.
Up to 50% of household air flows in from your crawlspace. An unenclosed crawlspace lets your heated or cooled air out and lets outdoor air in. This causes your heating and cooling systems to work overtime to compensate for this fluctuation in temperatures, causing you to still feel cold floors and inconsistent temps throughout the house. These units burn more energy leading to increased utility bills. This also puts more strain on the system leading to repairs and replacements sooner and more often.
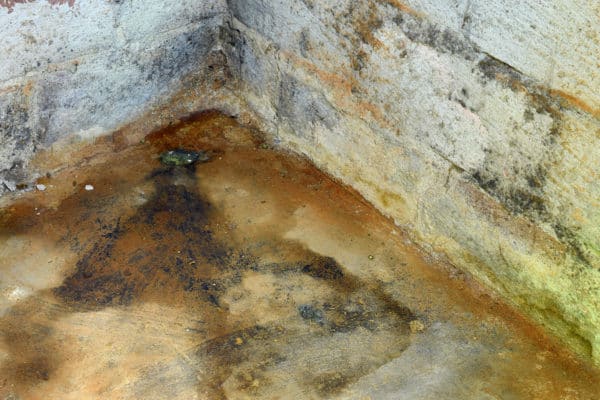
Crawlspace enclosure is similar to adding a liner to your pool to avoid leaks. Water vapor enters your crawlspace from the ground and can even seep through cement. Increased moisture can cause a host of problems in your crawlspace and your home. Moisture attracts pests; degrades indoor air quality; provides the ideal condition for mold and mildew growth which leads to rot, warped floors, and structural damage. Adding a moisture barrier and dehumidifier is a great way to help keep the moisture out of your crawlspace.
Some common reasons people enclose their crawlspace include:
- Presence of mold
- Presence of mildew
- Musty smell
- Soft or separating floors
- Increased heating and cooling costs
- Wet insulation
- Condensation on windows
- Pest problems
Benefits
- Improved air quality in the home
- Keeps pests and wood destroying insects out
- Creates more comfortable living conditions
- Eliminates moisture which decreases fungus and mold and prevents structural damage
- Increases energy efficiency
- More consistent temperatures
- Less wear and tear on heating and cooling systems
Disadvantages
There are two main disadvantages to crawlspace enclosure. The first is the initial cost of installation. While there is a somewhat pricey initial fee for installation, the savings in energy bills and pest control costs over the long term offset these costs. The second disadvantage is improper installation. Whether doing it yourself or using a professional, improper installation or faulty materials do occur. The most common signs of improper installation include:
- Odors. When the liner is not properly taped or inadequate materials are used, moisture can get into the crawlspace leading to mold and mildew.
- Moisture. This can also be caused by improper taping. Common signs of moisture in the crawlspace after installation include damp or musty odors, constant running of the dehumidifier, and flooding.
Inspection
Once you have your crawlspace enclosed, it is important to continually inspect it to make sure tears or other damage have occurred. It is recommended that the crawlspace be inspected at least once per year but preferably twice per year. Many homeowners time their crawlspace enclosure inspection to coincide with their annual termite inspection. It is important to check the crawlspace for moisture levels (there should be no humidity, condensation, or standing water); signs of mold or rot (including loose joists, damage to support beams and air ducts, or visible mold present); and signs of rodents or pest activity (including droppings and chew marks).
While crawlspace enclosure can be a DIY project, it is recommended that installation be done by a professional. This not only helps ensure quality materials and appropriate techniques are used but also guarantees repairs and replacement in the event there are issues. Contact your local pest control company for a crawlspace enclosure quote.
You May Also Be Interested In:
Have a Pest-Free Holiday!
Is That A Rat or A Mouse and Why It Matters
Crawly Winter Insects
5 Reasons To Install Gutter Guards
Unusual Winter Wildlife
Aug 14, 2020 | CrawlSpace
There are over 27 million homes in the United States with crawlspaces. These crawlspaces are typically used for storage and easy access to plumbing but can also harbor water and mold. They are dirty, damp places that provide an ideal environment for mold, mildew, pests, and rust. Keeping your crawlspace dry is essential to improving the overall health of your home. Here are the essentials to crawlspace moisture barriers.
What is a crawlspace?
A crawlspace is a variation of a basement where you can crawl around. The surface of a crawlspace is often just bare earth. They are traditionally built for homes without a basement or for homes that aren’t built on a slab. The primary purpose of crawlspaces was to promote air circulation throughout the home and to allow easy access to plumbing, electrical, and other home maintenance needs. The crawlspace can also be used for extra storage.
Where does crawlspace moisture come from?
Crawlspace moisture usually comes from one of three sources:
- Bulk water. Water can accumulate from plumbing leaks or blocked drains. The longer this water remains stagnant, the worse the moisture problem can get.
- Outdoor air coming through vents. The vents around a crawlspace provide the perfect access for vapor from the outside air to come in, thus increasing your humidity levels.
- Moisture from the ground. Uncovered soil releases moisture into the air, thus releasing it into the crawlspace.
What are the benefits of crawlspace moisture control?
Controlling the moisture levels in your crawlspace provides you with several benefits, helping to improve both your health and the health of your home. The benefits include:
- Avoiding negative health effects from mold and mildew
- Increasing your home’s resale value
- Decreasing the risk of mold, mildew, wood rot, and floor failure
- Decreasing your heating and cooling bills
- Preventing insects and dust mites
- Eliminating odors
- Improving indoor air quality
What should crawlspace moisture levels be?
Crawlspace moisture should be kept at an appropriate level to help prevent adverse effects on your home and your health. The Environmental Protection Agency (EPA) recommends keeping the relative humidity in your home between 30% and 50%.
What is a vapor barrier?
A crawlspace vapor barrier is a set of polyethylene sheets that are placed on the uncovered soil of your crawlspace to prevent moisture from seeping through. This helps improve the relative humidity levels in the crawlspace. Vapor barriers, also known as moisture barriers, are often used in conjunction with dehumidifiers and/or crawlspace encapsulation.
Do you still have questions about crawlspace moisture barriers? Do you have an issue with moisture in your crawlspace? Contact a professional who can come out and inspect your crawlspace, identify potential areas of concern, and recommend the best treatment plan for your situation.
Dec 20, 2019 | Alabama Blogs, Georgia Blogs, Termite Control
By Anna V., Editorial Lead — Pest Education · Last updated: May 2026
Termites cause an estimated $5 billion in property damage across the U.S. every year, and the Southeast accounts for a disproportionate share because of our warm, humid climate. At Northwest, we inspect for termites year-round across Georgia, Alabama, Tennessee, and South Carolina, and the pattern we see over and over is the same: homeowners assume they’re either lucky or unlucky when it comes to termites. They’re neither. Termite damage is largely preventable, and the homes that get hit hardest almost always have one or more risk factors that could have been addressed years earlier.
Here’s the full termite prevention playbook for Southeast homes, including the conditions that attract termites, the DIY steps that actually move the needle, when professional treatment is worth it, and how often you should be inspecting.
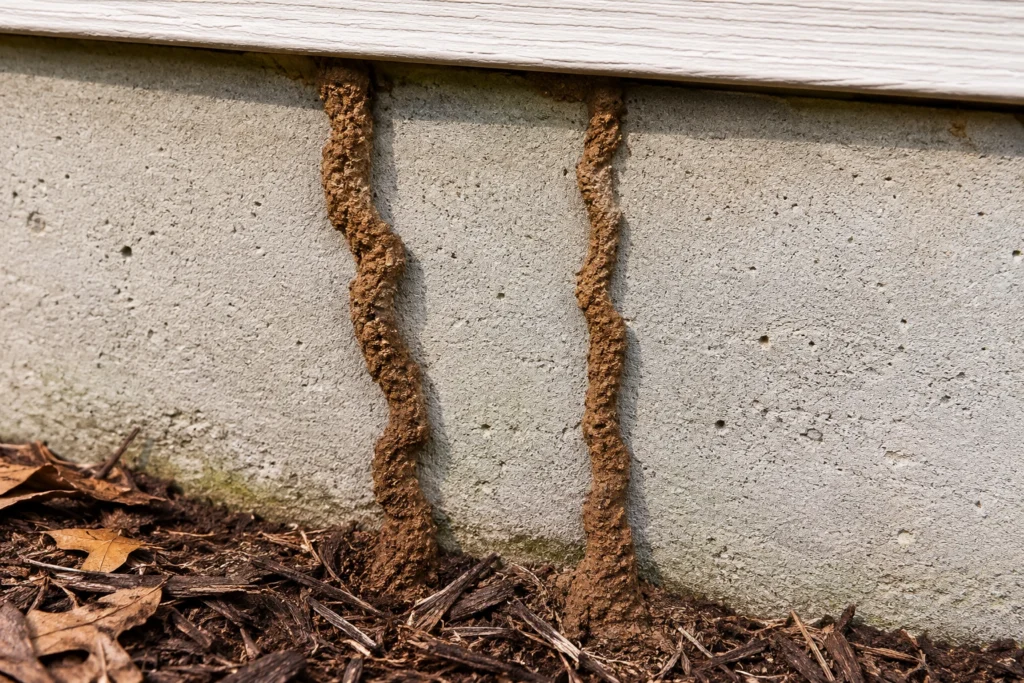
Mud tubes on a foundation wall are the most reliable early warning sign of subterranean termite activity.
Why Termite Prevention Is Essential in the Southeast
Three facts make termite prevention non-optional for Southeast homeowners:
- Eastern subterranean termites are present in every county of Georgia and Alabama. They’re not a “what if,” they’re a “when.” The question for most homes isn’t whether termites are nearby, it’s whether your house has the conditions that let them in.
- Damage is usually invisible until it’s significant. Termites work inside wood from the interior outward. By the time you can see visible damage on a wall, sub-floor, or window frame, you’re typically looking at thousands of dollars in repair on top of treatment.
- Most homeowner insurance does not cover termite damage. Repair costs come out of your pocket. Average treatment + repair for a moderate infestation in the Southeast runs $3,000 to $8,000.
Common entry points: wood-to-soil contact around the foundation, cracks in slab foundations or concrete blocks, expansion joints, leaky pipes or excessive moisture, mulch or firewood piled against exterior walls, and gaps where utility lines penetrate the foundation.
Identifying Termite Risk Factors on Your Property
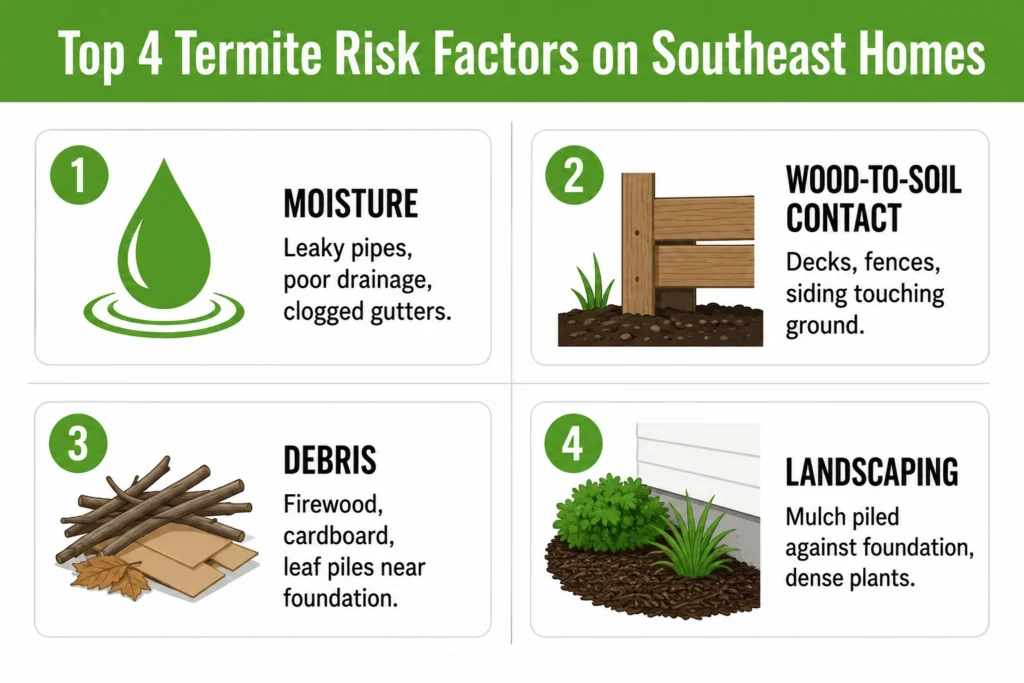
Four risk factors account for most Southeast termite calls. Fix these and you remove the conditions termites need.
Four conditions account for the majority of termite activity in Southeast homes. If you have one or more of these, you’re at elevated risk regardless of what neighbors are seeing.
1. Moisture and Water Issues
Subterranean termites need consistent moisture to survive. Anything that creates a damp microclimate near or under your home raises the risk:
- Leaky exterior faucets, hose bibs, or irrigation lines
- Clogged or missing gutters that dump water at the foundation
- Landscaping graded toward the house rather than away from it
- Air conditioner condensate lines that discharge near the foundation
- Plumbing leaks under sinks, in crawl spaces, or in slab penetrations
2. Wood-to-Soil Contact
Wherever wood touches soil directly, you’ve given termites a no-effort entry path:
- Wooden deck posts set directly in the ground without concrete footers
- Wooden fence posts touching the house
- Wood siding that extends below grade level
- Trellises or arbors attached to the house with the base in soil or mulch
- Wooden steps or porch supports without termite shields
3. Clutter and Yard Debris
Debris near the foundation provides food, shelter, and a launching point for termite colonies:
- Firewood stacked against the house or within 20 feet of the foundation
- Cardboard boxes, lumber, or pallets stored next to the house
- Leaf piles and yard waste against exterior walls
- Old tree stumps within 20 feet of the foundation (subterranean termites love decaying stumps)
4. Landscaping Decisions
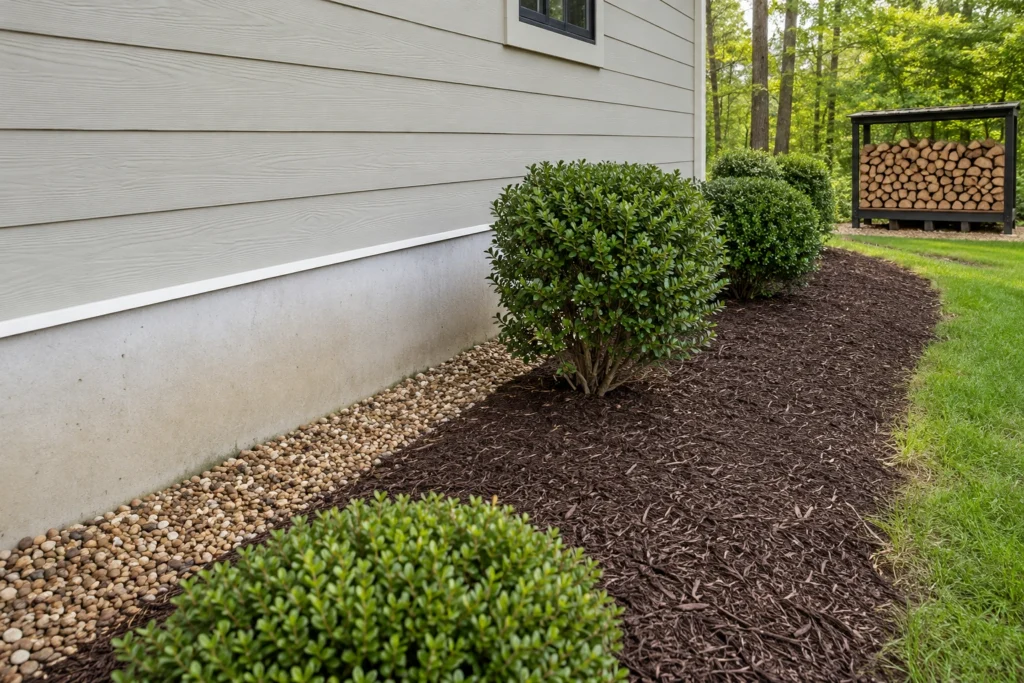
Mulch is great for gardens but problematic near foundations:
- Maintain a 2- to 3-foot gap between mulch and the foundation
- Use pea gravel or river rock in the 2-foot zone immediately adjacent to the foundation
- Trim shrubs back from exterior walls (dense vegetation traps moisture and hides mud tubes)
- Avoid heavy irrigation right at the foundation
DIY Termite Prevention Tips
Most prevention work is structural and seasonal. Done right, these steps significantly lower your risk without specialized equipment.
Regular Inspections
Walk your property twice a year (spring and fall) and look for:
- Mud tubes (pencil-thick brown tunnels) running up foundation walls or in crawl spaces
- Wood that sounds hollow when tapped or has blistering paint
- Small piles of what looks like sawdust or fine pellets near wood structures (frass from drywood termites or carpenter ants)
- Discarded wings near windows or doors after a warm rainy day (termite swarmer evidence)
- Sagging or warped flooring that wasn’t there before
Moisture Control
- Clean gutters twice a year and install gutter guards if you have heavy tree cover
- Add downspout extensions to direct water 4+ feet from the foundation
- Run a dehumidifier in basements and conditioned crawl spaces (target 50% RH or below)
- Fix any plumbing leak within 48 hours
- Re-grade landscaping if water pools near the foundation after rain
Remove Wood and Debris Near the Home
- Move firewood to a rack at least 20 feet from the house and elevated off the ground
- Remove old tree stumps within 20 feet of the foundation
- Store lumber, cardboard, and yard tools off the ground in a shed or garage
- Rake fallen leaves away from foundation walls
Natural Deterrents (Supplementary Only)
These don’t replace professional treatment for active infestations but can complement prevention:
- Orange oil or neem oil treatments on exposed exterior wood
- Diatomaceous earth along the foundation perimeter (works on a range of pests including some termites)
- Borate-based wood preservatives on accessible structural wood (decks, fences)
Professional Termite Prevention Methods
For Southeast homes, professional termite prevention is the highest-ROI structural investment most homeowners make. It’s also the only thing that meaningfully protects against a heavy subterranean termite year.
Chemical Barrier (Liquid Termiticide) Treatments
Pest control technicians trench around the foundation and apply a long-lasting termiticide (typically fipronil or imidacloprid) into the soil. This creates a continuous chemical barrier that subterranean termites can’t cross to reach the structure. Modern non-repellent termiticides are particularly effective because the termites don’t detect them and carry the active ingredient back to the colony, often eliminating it. Typical protection lasts 5 to 10 years.
Termite Bait Systems
In-ground bait stations placed around the foundation contain cellulose attractive to subterranean termites. Foraging termites find the bait, share it with the colony through grooming and food exchange, and the active ingredient (typically hexaflumuron or chlorfluazuron) disrupts molting and eliminates the colony. Sentricon and similar systems require ongoing monitoring (typically quarterly or annually) and offer long-term colony elimination rather than just a barrier.
Inspection and Monitoring Services
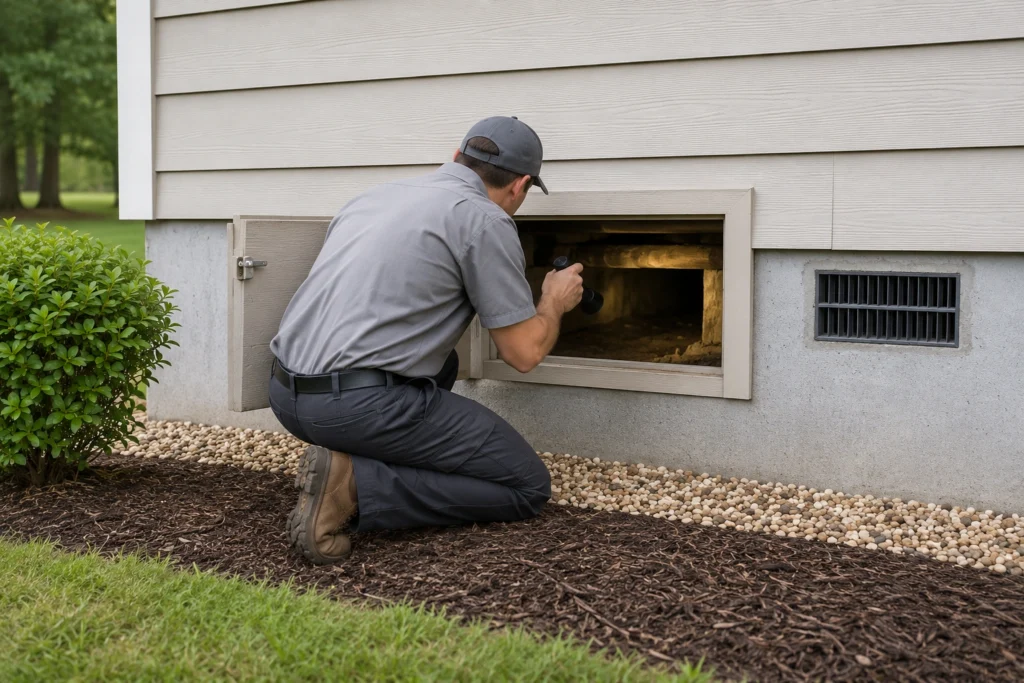
Professional inspections detect early signs homeowners miss: subterranean mud tubes in inaccessible crawl spaces, drywood damage inside wall voids, moisture issues that create termite-favorable microclimates. Annual inspections are the minimum recommendation for Southeast homes. Twice yearly is more appropriate for homes with risk factors or in heavily wooded areas.
When to Call a Professional Immediately
- Mud tubes on the foundation, in crawl spaces, or inside the home
- Discarded swarmer wings near windows or doors
- Hollow-sounding or visibly damaged wood
- Frass (fine wood-colored pellets) near wood structures
- Sagging floors or doors that suddenly don’t close properly
- You’re buying a home in the Southeast (a pre-purchase termite inspection is essentially required by every reputable lender)
Carpenter Ants vs Termites: Don’t Confuse Them
Carpenter ants and termites both damage wood, but they’re different pests with different treatments. Homeowners often confuse the two:
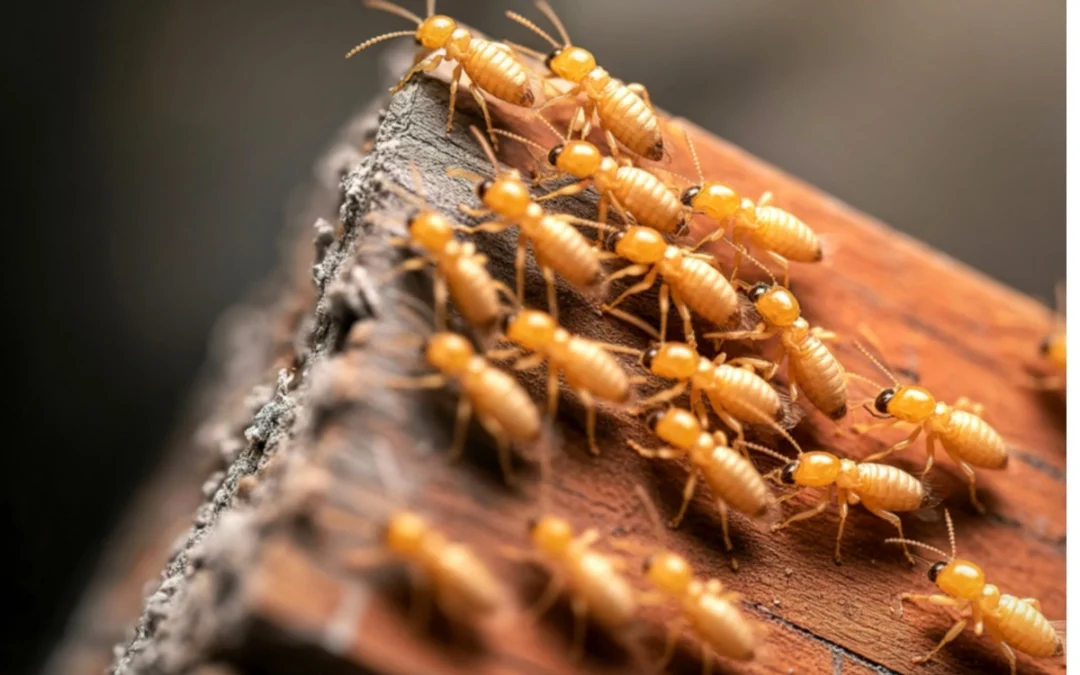
- Termites eat wood for nutrition. Damage looks smooth and follows the wood grain. Bodies are pale/cream-colored with straight antennae and equal-length wings (in swarmers). They build mud tubes.
- Carpenter ants excavate wood for nesting (they don’t eat it). Damage looks like clean tunnels with sawdust-like frass nearby. Bodies are dark, segmented, with bent antennae and wings of unequal length. No mud tubes.
Both warrant professional treatment, but the methods differ. If you’re unsure which you’re dealing with, see our ants in the kitchen guide for carpenter ant identification details.
Seasonal and Regional Considerations
A foundation with proper drainage, mulch clearance, and no wood-to-soil contact is the structural baseline for termite prevention.
Termite activity follows distinct seasonal patterns in the Southeast:
- Late winter through spring (February-May): Peak swarming season. Subterranean termite swarmers emerge after warm rains, mate, and start new colonies. Most homeowner discoveries happen during this window.
- Summer (June-August): Colonies are at maximum foraging activity. Damage progresses fastest during these months.
- Fall (September-November): Reduced swarming but continued foraging. Good time for prevention work because next year’s swarmers haven’t emerged yet.
- Winter (December-February): Slowed but not dormant in the deep South. Indoor heated environments can keep populations active year-round.
Schedule professional inspections in late winter (January-February) so you catch any new activity before peak swarming season.
Termite Prevention Cost vs Damage Cost
A perspective on the math:
- Annual termite inspection: $75 to $200
- Initial liquid termiticide treatment (typical Southeast home): $1,200 to $2,500
- Bait system installation: $1,500 to $3,000, plus $300 to $600 annual monitoring
- Average damage repair from moderate infestation: $3,000 to $8,000
- Severe damage repair (structural beams, sub-floors): $10,000 to $25,000+
Prevention almost always costs less than treatment + repair, often by a factor of 5 to 10x. For a deeper authoritative reference, UGA Extension’s subterranean termite management guide covers the biology and treatment options in technical detail.
(Worried about termites or due for an inspection? Schedule a free Northwest inspection and we’ll assess your risk factors and recommend the right protection level.)
Frequently Asked Questions About Termite Prevention
Can termites be prevented entirely?
No method is 100% foolproof, but the combination of structural prevention (sealing entry points, controlling moisture, maintaining wood-to-soil separation), professional barrier or bait treatment, and regular inspections reduces risk by an enormous margin. Properly protected Southeast homes are very rarely the ones we see with serious termite damage.
How often should I have a termite inspection?
Annual inspections are the minimum for Southeast homes. Twice yearly (spring and fall) is more appropriate for homes with elevated risk factors (heavily wooded lots, moisture issues, older construction, history of prior termite activity). Pre-purchase termite inspections are essentially required when buying or selling a home in our region.
Are DIY prevention methods effective?
Yes for risk reduction, no as a complete substitute for professional treatment. DIY moisture control, debris removal, wood-to-soil separation, and structural maintenance significantly lower the conditions termites need to establish. Professional treatment (liquid barrier or bait system) is what actually protects against active subterranean colonies that exist in your soil regardless of what you do at the surface.
What’s the best way to protect a new home?
New construction in the Southeast benefits enormously from pre-construction termiticide application (the slab and footings are treated before concrete is poured) or physical barrier installation. Ongoing annual inspections and proper landscaping maintenance preserve that protection. Many Southeast builders include the initial treatment, but the long-term maintenance is on the homeowner.
What does a termite inspection actually involve?
A thorough inspection covers the foundation perimeter (interior and exterior), crawl spaces, basements, accessible attic space, plumbing penetrations, exterior wood structures (decks, porches, fences attached to the home), and any moisture issues. Inspectors look for active mud tubes, damaged wood, frass, discarded wings, and conducive conditions. A typical inspection takes 45 to 90 minutes depending on home size.
Most termite damage starts in places homeowners can’t easily see.
Schedule a Termite Inspection Today
If you haven’t had a termite inspection in over a year, you’re seeing any of the warning signs above, or you’re buying a home in the Southeast, Northwest’s team handles the full termite workflow: inspection, treatment selection, application, and ongoing monitoring. Most termite protection programs pay for themselves many times over in avoided damage.
About the Author
Anna V., Editorial Lead — Pest Education leads pest education content for Northwest Exterminating, working with senior technicians and service center managers across our Georgia, Alabama, Tennessee, and South Carolina service areas to translate field expertise into homeowner-friendly guides. The focus: accurate, regionally-specific answers to the pest questions Southeast homeowners are actually searching for.
Dec 13, 2019 | CrawlSpace
Should you enclose your crawlspace this winter? The resounding answer is yes. There are several benefits to crawlspace enclosure, especially when cold weather sets in and energy costs soar. Most crawlspaces house pipes, ducts, and other appliances. Continuous exposure to cold air and freezing temperatures can lead to frozen and busted pipes and potential water damage. While it is important to keep your crawlspace clean and dry year-round, it is especially important in the winter as it can easily become damp and humid. The excessive moisture and extreme temperatures can also cause significant damage to your home.
While closing your crawlspace vents can help, it is often not enough to keep moisture, insects, and other pests out of your crawlspace. The moisture found in crawlspaces attracts pests like termites, roaches, and millipedes and the crawlspace provides the ideal entry point to your home. The increased humidity also provides the ideal environment for mold and wood rot which can lead to serious health issues for your family and trigger allergies and asthma.
Cold air from your crawlspace can also seep through into your home, keeping your floors cold and causing your heating system to work overtime, greatly increasing your energy costs.
So what can you do this winter to keep the cold and the pests out of your crawlspace? Here are 4 steps to protecting your crawlspace this winter.
1. Clear Those Gutters
Your gutters can’t drain properly when they are clogged with leaves and debris. These clogs cause overflows with the water collecting at the base of the house. This overflow then seeps into the ground and evaporates into your crawlspace. Standing water from clogged gutters also attracts pests like mosquitoes and roaches to your home. Make sure runoff is directed away from the base of your home. If possible, extend your gutters to drain at least 10 feet away from your crawlspace. Make sure your gutters stay clean and free of debris. Consider installing gutter guards to help prevent clogs.
2. Close and Seal Air Vents
Although air vents allow air to circulate through your crawlspace, they also provide an entryway for water and moisture. In the winter, close all the air vents to your crawlspace before the temperatures get too cold. Have them sealed properly to prevent rainwater and moisture from getting inside. This also helps ensure your crawlspace stays warm in the winter and cool in the summer.
3. Seal Your Crawlspace
Your crawlspace walls, corners, and even base can have tiny holes that allow air leaks into the area. Professionally sealing your crawlspace can help prevent air from circulating through these cracks which, in turn, helps reduce humidity and keeps the warm air in.
4. Install A Vapor Barrier
Most crawlspaces have no covering or protection on their floors. A substantial amount of water evaporates from the ground and increases the humidity in the crawlspace. The professional installation of a vapor barrier can help prevent this evaporation and keep water and moisture out.
Whatever the season, crawlspace enclosure is a beneficial addition to your home. It not only helps increase the air quality of your home by preventing mold and wood rot, it also provides a natural pest control barrier. It also helps keep the cold air out, which means your heating unit doesn’t have to work as hard, increasing its efficiency and decreasing your energy costs.
You May Also Be Interested In:
How To Deal With Moles This Winter
Keeping Pests Away From Your Holiday Treats
How To Save Money on Your Energy Bills
Why Are There So Many Millipedes in My House?
10 Ways to Make Your Home Healthier